
Understanding the process of asphalt paving helps property owners make better decisions before starting any asphalt paving installation project. From asphalt paving ground preparation to the final layer, every stage affects the strength, appearance, and lifespan of the pavement. Asphalt paving takes some real planning, the right tools, and crews who know what they’re doing, or you’ll end up with a driveway or parking lot full of cracks and potholes before you know it. Doesn’t matter if it’s for your house, a business, or a busy road, every stage decides how long that pavement lasts, how it looks, and how well it holds up under daily use and wild weather swings.
We proudly provide asphalt paving services throughout Buffalo, NY and surrounding Western New York areas, including Cheektowaga (14225), Amherst (14226), West Seneca (14224), Tonawanda (14150), and Lackawanna (14218), where harsh lake-effect weather creates unique paving challenges.
Knowing what actually goes into asphalt paving helps you see why it pays off to hire people who won’t cut corners. When you get it right from the start, each layer under the surface does its job, giving you much better performance and fewer hassles later on.
Thinking about paving? Just call All Pro Paving Service at (716) 666-4241 for good advice and quality work that lasts.
We specialize in Residential Asphalt Paving, Commercial Asphalt Paving, Asphalt Driveway Installation, and Parking Lot Paving throughout Western New York.
How Does Asphalt Paving Work?
The whole thing breaks down into a series of steps, not just throwing down asphalt and hoping for the best. It starts by clearing and prepping the ground, making sure the soil won’t sag or shift, and then comes building up multiple layers, each one with a purpose. You’ve got the base layers for support, and then the top layer for that smooth, blacktop look everyone sees.
In Buffalo neighborhoods near Canalside, Niagara Square, and the Buffalo River waterfront, asphalt must be engineered differently due to freeze-thaw cycles and heavy snow removal operations.
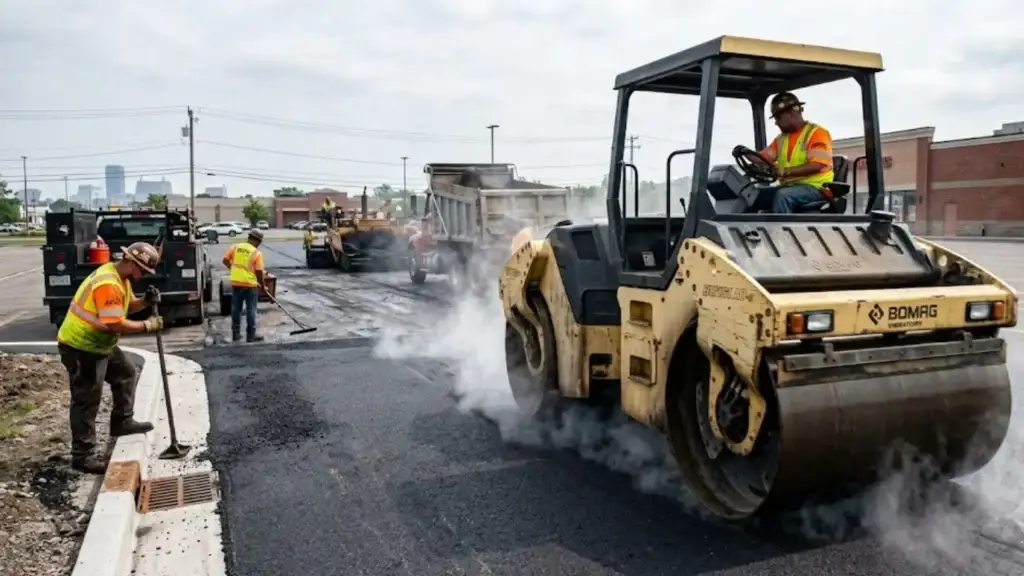
Pros start by clearing the site and testing if the ground is firm enough. They lay a strong foundation with crushed stone, put down a binder course, add the top layer or “wearing course,” and then compact everything with heavy rollers. The compaction locks it all together and gets rid of air gaps. Finally, you wait for it to cool before opening it up to cars.
Using modern asphalt paving equipment helps keep everything even and smooth, so you don’t end up with wonky spots or early potholes.
Phase 1: Site Preparation and Subgrade Compaction
Every solid pavement starts with prepping the ground. Good asphalt won’t last if you throw it on poor soil.
In areas around Niagara Falls Boulevard, Elmwood Village, and downtown Buffalo near KeyBank Center, soil conditions and traffic loads require stronger base preparation and reinforced compaction techniques.
First, the crew clears out grass, stumps, debris, old pavement, and anything that’ll mess with the base. They look for drainage issues and weak spots, fixing those before moving on.
After clearing, it’s time for subgrade preparation, the native soil that has to support everything above. Crews grade it for the right slope so water drains away. Let water pool just once, and you’ll get cracks and potholes down the road.
Then they compact the soil using heavy rollers. This makes sure the ground won’t settle or cause bumps later.
Crews with good equipment, excavators, graders, compactors, and even laser-leveling systems get the base just right, making sure the ground is ready for all that weight.
Skip this step or do it halfway, and even new asphalt can fall apart fast.
Phase 2: Base Course Installation
Next comes the base course, usually made from crushed gravel or stone. This is like armor for your pavement, spreading out the weight of vehicles.
Crews lay out the rock, then pack it down until it’s super-dense and sturdy. The thickness just depends on the driveways need less, while any place with big trucks rolling through needs more.
This step also includes careful grading to make sure water goes toward drains, not pooling on the surface.
Get this right, and your pavement lasts longer and needs fewer repairs.
Asphalt Layer Thickness Guide (Local Standard Reference Table)
| Project Type | Subgrade Depth | Base Course | Binder Course | Wearing Course |
| Residential Driveway (Buffalo suburbs) | 6 – 8 inches | 4 – 6 inches | 2 inches | 1.5 – 2 inches |
| Commercial Parking Lot (Cheektowaga / Tonawanda) | 8 – 10 inches | 6 – 8 inches | 2 – 3 inches | 2 inches |
| Industrial Zone (Lackawanna / South Buffalo) | 10 – 12 inches | 8 – 10 inches | 3 inches | 2 – 3 inches |
These thickness standards are especially important in regions like Erie County, where frost heave and salt exposure shorten pavement lifespan if not properly engineered.
Phase 3: Binder Course Application
Now the binder course goes down. It’s a tough layer made with larger stones and asphalt cement, designed for maximum strength.
Paving machines spread the hot mix evenly, and workers keep a close eye on the temperature and thickness. Every detail matters, too cool or too thin, and you’ve got problems.
The binder ties the rock base to the final surface, soaking up most of the punishment from cars and trucks.
If you want each of these layers installed right the first time, call All Pro Paving Service at (716) 666-4241. They don’t mess around with the details.
Phase 4: Wearing Course Placement
This is the top layer, the one you see and drive on. It’s made with finer stones mixed into the asphalt, giving you that classic smooth, black look.
Pavers lay it out at exactly the right thickness. Too thin and it wears out, too thick and it’s just a waste. This layer keeps water and sunlight from beating up the base and binder underneath.
Once again, crews have to get the temperature right before they compact i,t that’s key for a smooth, strong finish.
Get this part right, and you get better traction, less noise, and a longer-lasting driveway or lot.
Phase 5: Compaction and Finishing
This might be the single most important step. Right after laying the asphalt, machines called rollers seal everything up while it’s still hot.
Rolling packs out any air pockets, boosting strength and water resistance, and drastically cutting the odds of future cracks.
Good crews use rolling patterns to hit every inch consistently. Wait too long, and the asphalt cools too much to compact properly.
This phase also includes cleaning up the edges, evening out the surface, and making sure water drainage is perfect.
Phase 6: Curing and Final Inspection
Asphalt cools pretty quickly, but the job’s not officially done just because it’s solid. Contractors need to let it cure, sometimes for a day or more, depending on thickness and weather.
Before calling the job finished, the contractor inspects for surface flaws, checks the drainage, and straightens out any rough areas. Paint markings or a protective seal might go on after it fully cures.
Sticking to a regular maintenance plan from here helps keep everything looking fresh and lasting longer.
Looking at Asphalt Layers: The Quick Visual
If you want to picture the whole thing, imagine a sandwich:
– The bottom is compacted earth.
– Next is a thick, tough stone base.
– On top of that is the strong binder layer.
– The “bread” up top is the wearing course – smooth and finished.
Each part matters. Skip one, or cheap out, and the pavement won’t last.
Timeline: How Long Does Each Phase Take?
Most people want to know: “How long will it take?” A simple driveway might be done in a day or two, but bigger projects like commercial lots need a few more days.
This paving process timeline gives homeowners a realistic expectation of how long the process of asphalt paving usually takes.
Prep can take several hours to a whole day. The base layer is next again, another day, depending on thickness and grading. Asphalt gets laid pretty fast with today’s machines.
Compaction has to happen right after the asphalt goes down. Then, depending on the weather and thickness, you’ll wait a few hours before driving on it, just to be sure.
Every project’s different, though, so ask your contractor for a schedule.
The Gear That Makes a Difference
Skilled workers matter, but you also need the right equipment, excavators to prep the site, graders for leveling, pavers to lay hot mix, dump trucks to bring it, rollers for compaction, and thermometers to check temperatures.
Professionals in Buffalo also rely on hot mix asphalt (HMA), PG-graded asphalt binders, and aggregate gradation testing to ensure long-term pavement performance under freeze-thaw stress.
Modern asphalt paving equipment plays a major role in delivering smooth, durable pavement.
Proper asphalt paving equipment means smoother roads, less waste, and better drainage. Spending money on good machines pays off with stronger, longer-lasting results.
Why Professional Installation Really Counts
Every step in the process of asphalt paving from grading and compacting to layering, affects how the surface performs in the long run. If the paving contractor skimps on any part, you’re looking at repairs sooner than you’d like.
Pros know how to balance weather, traffic, soil conditions, and material choices. They follow proven paving steps so you end up with a surface that stands up to whatever you throw at it.
If you want your next driveway, lot, or parking area to come out right, call All Pro Paving Service at (716) 666-4241. You’ll know it was done with care from start to finish.
Conclusion
Asphalt paving is serious business. When done right, it transforms plain ground into a reliable, smooth, and lasting surface. Each phase, from clearing and prepping the earth, laying down the foundation, applying the binder and the wearing course, to the final compaction, plays a big part in how strong your pavement will be.
If you understand the process, you’re in a better spot to make smart decisions when hiring a contractor and planning your project. Investing in great materials, pro-level installation, and people who care about the details really does mean better performance, safer surfaces, and fewer repair bills for years.
From residential neighborhoods in Amherst and Cheektowaga to commercial zones in downtown Buffalo and Tonawanda, proper asphalt installation is essential to withstand Western New York’s extreme seasonal temperature shifts.
If you want to dive deeper into the details, check out the National Asphalt Pavement Association (NAPA) at https://www.asphaltpavement.org.
Frequently Asked Questions
What are the steps in the asphalt paving process?
The process of asphalt paving includes subgrade preparation, base installation, binder course, wearing course, asphalt compaction, curing, and final inspection.
How long does asphalt paving take from start to finish?
It always depends on the job, but most home projects finish in a day or two, plus some time to cure before you can really start using it.
What happens during subgrade preparation?
During subgrade preparation, contractors perform asphalt paving ground preparation by grading, stabilizing, and compacting the soil.
How thick should each asphalt layer be?
It depends; driveways are thinner, while commercial parking lots or roads need thicker layers to handle big trucks.
Why is compaction so important?
Good compaction gets rid of air pockets, boosts the pavement’s strength, keeps water out, helps prevent cracks, and makes the whole thing last longer.